Sand Shape All 170 Levels: Complete Walkthrough Guide
A full breakdown of every Sand Shape level from 1 to 170 — what to expect, how difficulty ramps up, and the strategies that carry you through each section of the game.
Sand Shape All 170 Levels: Complete Walkthrough Guide
Sand Shape has 170 levels. That's not a typo. One hundred and seventy geometric logic puzzles, and if you're the kind of person who picks up a puzzle game and can't put it down until the map is fully cleared, you already know that number is both exciting and a little intimidating.
I've played through the entire game — every Sand Shape level, start to finish — and I want to lay out the whole arc for you. Not step-by-step solutions for each individual level (we have dedicated pages for that), but the big picture: what each chunk of the game feels like, what skills you need to develop, where the walls are, and how to get past them without rage-quitting.
The difficulty curve in Sand Shape is genuinely well-tuned. It doesn't spike randomly. It builds — each section introduces something new, lets you practice it, and then twists it into something harder. If you understand the structure of the game, you can prepare yourself for what's coming instead of getting blindsided.
Let's walk through it.
Levels 1–40: Tutorial and the Basics
The first forty levels are where Sand Shape teaches you how to play. Don't mistake "tutorial" for "boring" though — even experienced puzzle players should take these levels seriously, because the habits you build here determine how smoothly you handle everything that comes after.
What you'll learn:
The opening levels introduce the core drag-to-fill mechanic. You trace your finger across regions of a shape container, and sand fills what you've traced. It's intuitive, almost meditative. By around level 5 or 6, the game starts layering in rules — fill regions in a specific order, respect symmetry, use specific sand colors in specific areas. Each rule is introduced one at a time so you're never overwhelmed.
Levels 15 through 25 start combining rules. You'll see levels that require both ordering and color placement, or symmetry and multi-region thinking. The containers get more complex — divided polygons, shapes with internal walls, things that look simple but have hidden constraints.
By level 30, you're solving genuine logic puzzles. Not hard ones yet, but real ones. The game stops holding your hand and starts testing whether you actually understood the mechanics it showed you.
How to approach this section:
- Don't rush. The temptation is to blast through levels 1–20 because they're easy. Resist it. These levels are teaching you finger control and rule-reading — skills you'll lean on for the next 150 levels. Practice smooth, deliberate tracing strokes. Get comfortable planning before you drag.
- Read every rule. This sounds obvious, but you'd be amazed how many people skim the constraint text and start filling immediately. The rule is the puzzle. Take the two seconds.
- Experiment freely. There's no penalty for restarting in this section. Try things, mess up, reset. The low stakes make this the best time to develop your intuition for how sand behaves in different container shapes.
If you finish level 40 feeling confident in your tracing, your rule comprehension, and your ability to plan a solution before executing it, you're ready for what's next.
Levels 41–80: Intermediate Difficulty — New Rules Enter the Chat
This is where Sand Shape stops being a tutorial and starts being a game. Levels 41–80 introduce a steady stream of new mechanics and rule types, and the difficulty ramps up noticeably.
What changes:
Around level 45, you'll see your first truly irregular board shapes — containers with notches, cutouts, and asymmetrical sections that limit where sand can flow. The piece sets get more varied too. Where the early levels mostly used simple shapes, you're now working with L-pieces, T-pieces, and other polyominoes that don't tile as cleanly.
Level 50 is what a lot of players consider the first real wall. The board is bigger, the pieces are awkward, and for the first time, brute-force filling doesn't work. You have to think about which piece is most constrained and place it first. If you haven't developed that instinct yet, level 50 will teach it to you the hard way.
By the time you hit level 65–70, the game is throwing multi-region puzzles at you regularly. Boards split into separate areas connected by narrow bridges, and you have to partition your pieces between regions intelligently. This is also where red herring pieces start showing up — extra pieces in your set that look like they should fit somewhere but actually can't be used. The game is testing whether you can identify what's relevant and what's a distraction.
How to approach this section:
- Place the most constrained piece first. This is the single most important skill in Sand Shape, and levels 41–80 are where it becomes essential. Before you start filling, scan your pieces and find the one with the fewest valid positions — usually a large piece or an awkwardly shaped one. Commit that piece first, then solve around it.
- Fill awkward areas before easy ones. If a board has a notch or a narrow section, handle that first. The main body of the grid is usually flexible enough to fill with whatever's left, but the awkward corners are where you'll get stuck if you save them for last.
- Watch for red herrings. If your piece set feels larger than the board needs, some pieces are probably decoys. Figure out which ones can't possibly fit and mentally set them aside — don't waste time trying to force them in.
- Count cells. It sounds tedious, but knowing the cell count of a region tells you exactly how many pieces need to go there. This is especially useful for multi-region levels where you need to partition your piece set.
This section is long — forty levels of steadily increasing complexity — and by the end of it, you'll have developed a real problem-solving toolkit. The skills you build here are the foundation for everything in the back half of the game.
Levels 81–120: Advanced Difficulty — Time Limits Arrive
Here's where things get spicy. Levels 81–120 take everything you've learned and add the one ingredient that turns a logic puzzle into a pressure cooker: timers.
What changes:
Starting around level 85, some levels introduce time constraints. At first, the timers are generous — you might get two or three minutes on a board that would take you 90 seconds if you were focused. But they tighten up quickly. By level 100, you're looking at boards that would take three minutes to solve carefully, with a timer set to 90 seconds. By level 115, some levels give you barely a minute.
The time limit fundamentally changes how you play. You can't sit and reason through a solution from scratch — there isn't time. You need pattern recognition. You need to be able to look at a board and a piece set and immediately identify the skeleton of a solution: which two or three pieces are most constrained, where the awkward corners are, which region to solve first.
Level 100 is a milestone — a large 12×10 grid with a big set of pentominoes. It's the biggest board you've seen up to that point, and the sheer scale makes it hard to hold the full configuration in your head. The trick is to divide it into quadrants mentally and solve each one as a mini-puzzle.
How to approach this section:
- Develop pattern recognition, not memorization. You can't memorize a step-by-step solution because if one placement is slightly off, you're lost. Instead, learn to recognize configurations — "this looks like an L-in-the-corner setup" — and react to the pattern.
- Practice levels without trying to win. For timed levels, your first few attempts are recon. Play the level, don't worry about the timer, and just learn the board. Once you can read the solution in a few seconds, then go for the speed clear.
- Place your two most constrained pieces immediately. The moment the timer starts, drop the pieces that only have one or two valid positions. This gives you a skeleton to work from and kills that paralyzing "where do I even start" moment that eats 20 seconds.
- Restart aggressively on timed levels. If you're 40 seconds into a 60-second level and haven't placed everything, restart. Don't waste time on a doomed attempt. Every restart teaches you something about the board.
- Stay calm. The timer is designed to make you panic, and panic makes you place pieces badly. Take a breath. The solution is always logical — you just need to find it fast.
This section is where a lot of players hit their first real frustration wall. The time pressure is a skill check, not a difficulty spike. Once you learn to read boards quickly, the timers stop feeling unfair.
Levels 121–160: Expert Difficulty — Complex Grids and Cruel Designs
Welcome to the deep end. Levels 121–160 are where Sand Shape stops pretending to be friendly and starts testing whether you actually love puzzle games.
What changes:
Everything gets harder simultaneously. The boards are larger and more irregular. The piece sets are nastier — heavy on S-pieces, Z-pieces, and large pentominoes that resist clean tiling. Timers are tighter than ever. And the game starts introducing genuinely devious design tricks.
Level 135 flips the usual formula by giving you a grid that's mostly empty with only a few pre-filled cells, but a large piece set. The pre-filled cells act as anchors, but they split the grid into separate regions, forcing you to partition your pieces carefully. You have to count cells in each region and divide your piece set accordingly.
Level 145 gives you four — four — S/Z-pieces on a near-rectangular board. S-pieces are the worst pieces in polyomino puzzles because they don't tile rectangles. The solution is to push them to the edges of the grid where their jagged shape can fill gaps, and handle the interior with straight and L-shaped pieces.
Level 155 is the cruel one. It has a configuration that looks correct but isn't. You can fill every cell, and the game still tells you you've failed. There's a hidden constraint — usually about piece orientation or adjacency — buried in the level description. If you don't read carefully, you'll brute-force it for an hour and never figure out why it's wrong.
Level 160 splits the board into two regions connected by a single-cell bridge. The bridge piece determines the partition for both regions, so you have to solve the bridge first. Get it wrong and both regions become unsolvable. Get it right and you have two independent mini-puzzles.
How to approach this section:
- Read the level description carefully. Especially for levels in the 150s, the flavor text often contains hints about hidden constraints. Don't skip it.
- Check parity. Color the grid like a chessboard. Certain pieces always cover the same number of black and white cells. If the pre-filled cells make the remaining counts impossible for your piece set, you know you need a different approach. This sounds advanced, but it's surprisingly practical — it's caught several "unsolvable" levels for me.
- Handle S and Z-pieces first. Push them to the perimeter where their shape can fill edge gaps. Never leave them for the interior — if you have two S-pieces left in the middle of the grid, you've gone wrong somewhere.
- Solve bridges and connectors first. For multi-region levels with narrow connections, the piece that spans the connection determines everything. Identify it, place it, then solve each region independently.
- Take breaks. I cannot stress this enough. The hardest Sand Shape level feels impossible when you're frustrated and suddenly clicks after you walk away for an hour. Go make coffee. Come back. The solution will be there.
This section is brutal, but it's also where Sand Shape is at its best. Every level is a tightly designed puzzle with a satisfying solution. When you clear level 160, you've earned it.
Levels 161–170: The Final Challenge
The last ten levels. The developers saved the best — and the hardest — for last.
What to expect:
Level 165 is a pure speed run. You get 60 seconds — sometimes less — on a board that would take three minutes to solve without pressure. You can't reason through it. You have to recognize the solution pattern within the first five seconds and execute on muscle memory. Play it enough times and the board layout becomes familiar. Focus on placing the two largest pieces first and let the small ones fill the gaps.
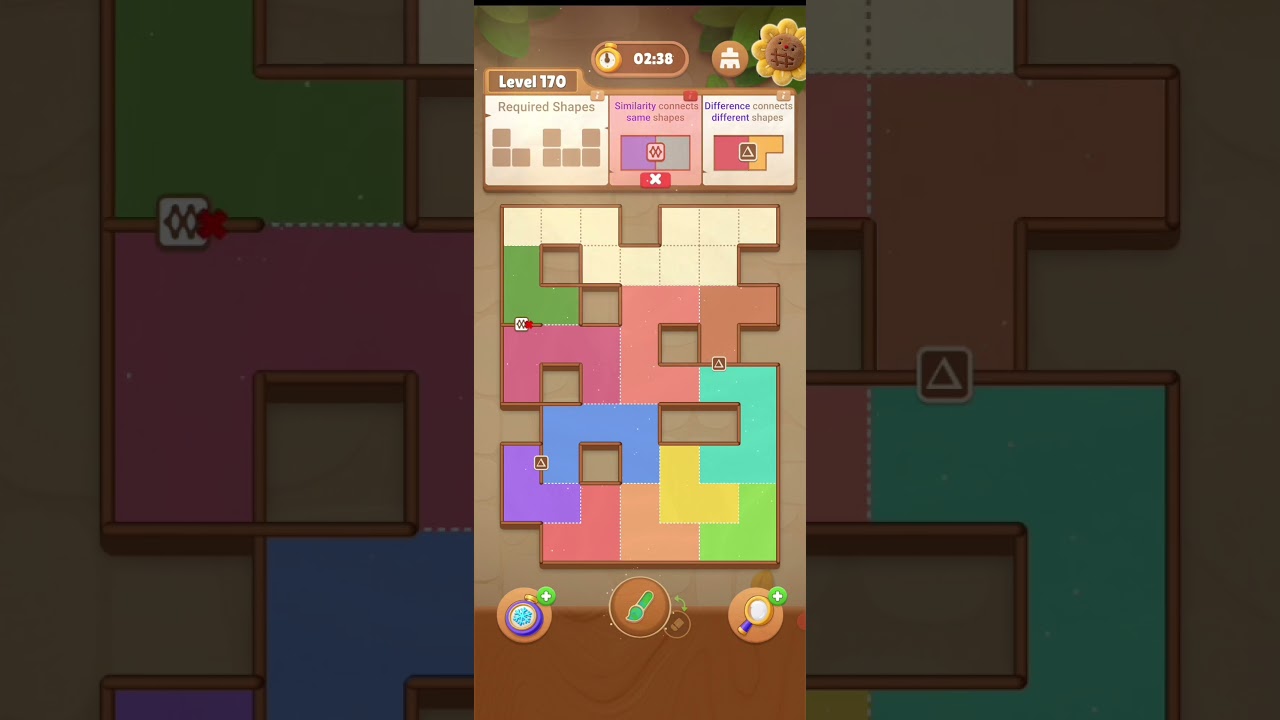
And then there's Level 170. The final boss. The game throws everything at you: a large irregular board, a nasty piece set heavy on L-pentominoes and S/Z-tetrominoes, pre-filled cells in awkward positions, and yes, a timer. This is the level that separates casual players from completionists.
How to approach the finale:
- Break Level 170 into phases. Phase one: place the pieces anchored by pre-filled cells — they're locked, so get them out of the way. Phase two: handle notches and irregular edges with L-pieces, which are great at fitting into corners. Phase three: fill the main body with your remaining pieces, largest first. Phase four: beat the timer, which means you need phases one through three essentially memorized.
- Restart liberally. Each attempt teaches you something about piece interactions, even if you fail. I probably attempted Level 170 forty times before I cleared it. Every failure narrowed the solution space.
- Don't panic on the speed levels. The timer on Level 165 is designed to induce panic. The solution is always there — you just need to see it fast. Practice until the board feels familiar, then execute.
- Enjoy it. This is the payoff for 160 levels of buildup. When you finally clear Level 170, it feels earned. That's good game design.
Want Help With a Specific Level?
This guide covers the big picture, but if you're stuck on a particular Sand Shape level, we've got you covered. Every single level in the game has its own dedicated walkthrough page with step-by-step solutions, pro tips, common mistakes, and video demonstrations.
Browse the full level list to find the level you're working on, or use the level jump search to go straight to a specific number. Whether you're breezing through the early levels or grinding out the final ten, there's a detailed guide waiting for you.
Good luck out there. All 170 levels are beatable — some just take more attempts than others.
Author

Categories
More Posts

Top 10 Hardest Sand Shape Levels (And How to Beat Them)
A breakdown of the 10 most brutal Sand Shape levels, what makes each one nasty, and the strategies that actually work.

15 Sand Shape Tips and Tricks That Actually Work
Practical Sand Shape tips to help you solve puzzles faster, avoid common mistakes, and beat tricky levels without rage-quitting.

7 Common Sand Shape Mistakes (And How to Fix Them)
Keep blowing runs in Sand Shape? Here are the seven mistakes that tank your score and the fixes that actually work.
Newsletter
Join the community
Subscribe to our newsletter for the latest news and updates