
Top 10 Hardest Sand Shape Levels (And How to Beat Them)
A breakdown of the 10 most brutal Sand Shape levels, what makes each one nasty, and the strategies that actually work.
Top 10 Hardest Sand Shape Levels (And How to Beat Them)
Sand Shape ships with 170 levels, and if you've been playing for a while you already know the difficulty curve is not messing around. The early levels lull you into thinking this is a chill little polyomino puzzle — drop a few shapes in a grid, move on. Then somewhere around level 40 the training wheels come off, and by the time you hit the back third of the game you're staring at a timer, a weirdly shaped board, and a set of pieces that seem designed to mock you.
I've spent way too many hours grinding through every Sand Shape level the game has to offer, and I want to save you some pain. Here are the ten levels that made me question my life choices the most, why each one is rough, and the approach that finally got me through.
What Makes a Sand Shape Level Hard
Before getting into specific levels, it's worth talking about what actually makes a Sand Shape level difficult. Most levels are geometric logic puzzles — you get a grid and a set of polyomino pieces, and your job is to tile the grid completely without overlaps or gaps. Sounds simple. It is not simple.
The difficulty comes from a few compounding factors:
- Board shape irregularity — the more cutouts and notches a grid has, the fewer valid configurations exist, and the harder it is to reason about where pieces can go.
- Piece set awkwardness — certain combinations of L-tetrominoes, S-pieces, and large pentominoes just don't play nicely together.
- Time limits — later levels introduce timers, which means you can't just sit and think. You need pattern recognition, not pure deduction.
- Red herring pieces — some levels give you more pieces than you need, or pieces that look like they should fit somewhere but don't.
The levels below hit at least two of these factors, and a few hit all four.
Level 50 — The First Wall
Level 50 is where a lot of players get stuck for the first time. The board is a decent-sized rectangle, but the piece set includes two L-tetrominoes, a T-tetromino, and a long I-piece that has to span almost the full width of the grid. The problem is that the L-pieces can fit in a bunch of places that look plausible but actually make the remaining space impossible to fill.
The trick here is to place the I-piece first. It's the most constrained piece on the board — it has to go in one of maybe two positions — so lock that down immediately. Once the I-piece is placed, the rest of the grid shrinks into a shape that's much easier to reason about. If you're stuck, try every valid I-piece position first and you'll usually find that only one of them leaves a solvable remainder.
Level 75 — The Notch Nightmare
This Sand Shape level introduces a board with a deep notch cut out of one side, which completely changes the geometry. The notch means that two of the pieces in your set have to "wrap around" the cutout, and the pieces that can do that are limited. Most players try to fill the main body of the grid first and save the notch area for last — this is backwards and it'll eat your time.
Fill the notch area first. Figure out which of your pieces can fit into and around the cutout, commit to one of them, and then solve the remaining rectangular space. The main body of the grid is much more forgiving once the awkward corner is handled. Also, if the level gives you an L-pentomino, that's almost certainly your notch piece.
Level 100 — The Big Grid
Level 100 is a milestone level and the game throws a proper large grid at you — we're talking a 12×10 board with a generous helping of pentominoes. The sheer size of the grid makes it hard to hold the whole configuration in your head, and there are multiple valid solutions, which sounds like it should be easier but actually makes it harder because you second-guess every placement.
The key insight for Level 100 is to divide the grid into quadrants mentally. Solve the top-left quadrant first using the pieces that feel most constrained, then work clockwise. Don't try to optimize — just find a valid placement for each quadrant and move on. If you get stuck in one quadrant, it usually means a piece you need was used in a previous quadrant, so backtrack one step rather than starting over. This level rewards systematic work over flashes of insight.
Level 120 — The Timer Arrives
Level 120 is the first level where the timer genuinely matters, and it's a rude awakening. You get a moderately complex board and maybe 90 seconds to solve it. The pieces aren't that bad, but the time pressure turns what would be a 3-minute puzzle into a frantic scramble.
The strategy here is speed through familiarity. Before you even look at the board, mentally catalog your piece set and identify the two most constrained pieces. The moment the timer starts, place those two pieces immediately — they usually only have one or two valid spots. This gives you a skeleton to work from and prevents that paralyzing "where do I even begin" feeling that eats up 20 seconds. Practice the level a few times without worrying about winning; just get used to reading the board fast.
Level 135 — The Sparse Grid
Level 135 flips the usual formula by giving you a grid that's mostly empty with only a few pre-filled cells, but the piece set is large and almost all pentominoes. The pre-filled cells act as anchors, but they're positioned in a way that makes the surrounding space hard to tile with the big pieces you have.
What makes this Sand Shape level nasty is that the pre-filled cells break up the grid into two separate regions, and you have to split your piece set between them. Count the cells in each region first — if one region has 25 cells and the other has 30, you know exactly how many pentominoes go to each side. Once you've partitioned your pieces correctly, each region becomes its own mini-puzzle and is much more manageable.
Level 145 — The S-Piece Gauntlet
S-pieces (and their mirror, Z-pieces) are the worst pieces in polyomino puzzles because they don't tile rectangles cleanly. Level 145 gives you four — yes, four — S/Z-pieces and asks you to fill a board that's almost rectangular. The temptation is to pair S-pieces with Z-pieces to form rectangles, but the board doesn't give you enough room to do that cleanly.
Instead, use S and Z-pieces along the edges of the grid, where their jagged shape can fill in the gaps created by other pieces. The interior of the grid should be handled by your straight and L-shaped pieces, which tile more predictably. If you find yourself with two S-pieces left in the interior, you've gone wrong somewhere — backtrack and reposition them to the perimeter.
Level 155 — The False Solution
Level 155 is cruel because it has a configuration that looks correct but isn't. You can place every piece, fill every cell, and the game still tells you you've failed. This is because there's a hidden constraint — usually related to the orientation or color of certain pieces — that isn't immediately obvious.
Look at the level intro text carefully. This Sand Shape level almost always has a hint buried in the flavor text about which pieces need to be in specific orientations. If there's no text hint, the hidden constraint is usually that certain pieces must not touch each other, or that a specific piece must be adjacent to a specific cell. Approach this one as a constraint-satisfaction problem: figure out what the hidden rule is before you start placing pieces, because brute-forcing it will just frustrate you.
Level 160 — The Two-Region Trap
Level 160 gives you a board that's split into two separate regions connected by a single-cell-wide bridge. You have to decide which pieces go to which region, and the bridge cell itself needs to be filled by a piece that spans both sides. This is a logistical nightmare because the bridge piece locks in the partition for both regions.
Solve the bridge cell first. Identify which of your pieces can occupy the bridge cell while extending into both regions — it's usually an I-piece or an L-piece. Place that piece, and now you have two independent regions with reduced piece sets. The level is designed so that the bridge piece choice determines whether both regions are solvable, so if one region feels impossible after you place the bridge piece, try a different bridge piece. There are usually only two or three candidates, so this is fast to iterate.
Level 165 — The Speed Run
If Level 120 was your introduction to timers, Level 165 is the final exam. You get 60 seconds — sometimes less — on a board that would take you three minutes to solve without pressure. The piece set includes a mix of tetrominoes and pentominoes, and the board has a couple of notches to keep things spicy.
You cannot solve this level by reasoning through it. You have to recognize the pattern. Play the level enough times that you can identify the solution configuration within the first 5 seconds of seeing the board. The board layout is fixed, so once you've seen it enough times, muscle memory takes over. Focus on placing the two largest pieces first — they have the fewest valid positions — and let the small pieces fill the gaps. If you're more than 40 seconds in and haven't placed everything, restart immediately. Don't waste time on a doomed attempt.
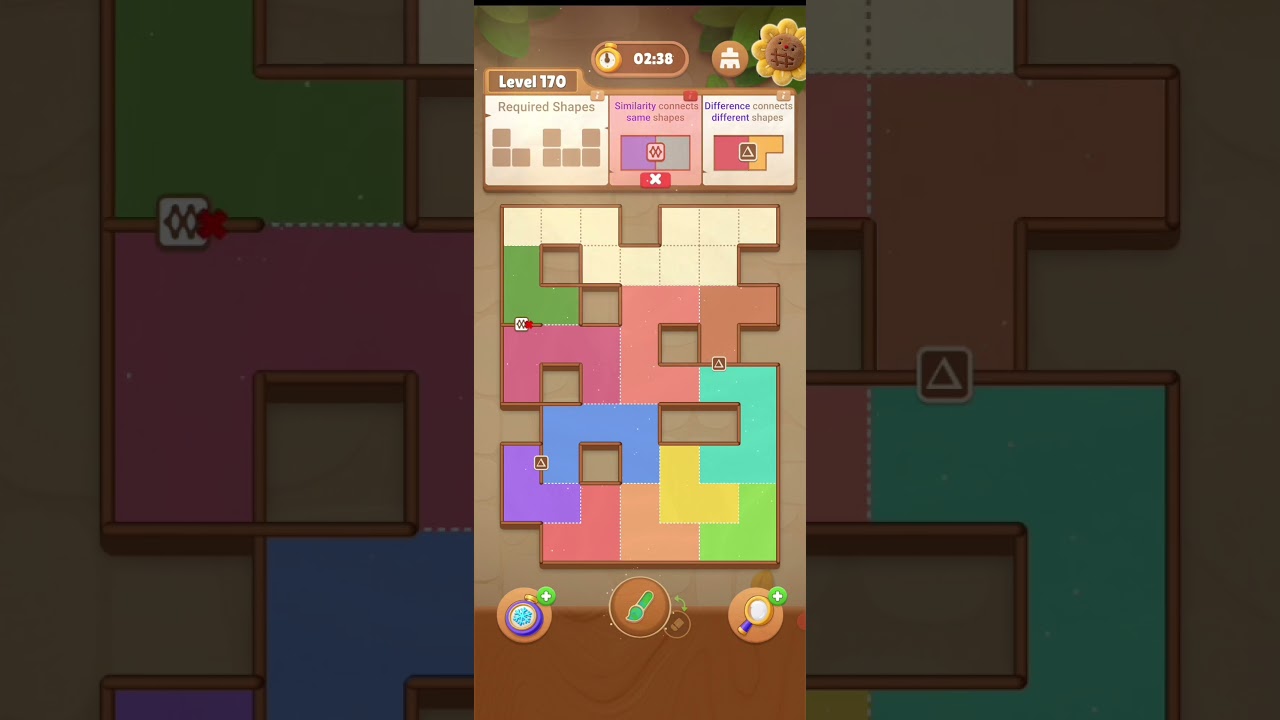
Level 170 — The Final Boss
The last level in the game, and the developers went all out. Level 170 combines everything: a large irregular board, a nasty piece set heavy on L-pentominoes and S/Z-tetrominoes, pre-filled cells in awkward positions, and yes, a timer. This is the level that separates casual players from completionists.
The approach that worked for me was breaking it into phases. Phase one: place the two pieces that are anchored by the pre-filled cells — these are locked in, so get them out of the way. Phase two: handle the notches and irregular edges with your L-pieces, since L-pieces are great at fitting into corners. Phase three: fill the main body with your remaining pieces, starting with the largest. Phase four: the timer. You need to be able to execute phases one through three in under a minute, which means you need to have the solution essentially memorized.
Don't be afraid to use the restart button liberally on Level 170. Each attempt teaches you something about the piece interactions, even if you fail. I probably attempted this level 40 times before I cleared it, and each failure narrowed down the solution space a little more.
General Tips for Surviving Late-Game Levels
A few things that apply across all the hard levels:
Always place the most constrained piece first. In every polyomino puzzle, some pieces have far fewer valid positions than others. Find those pieces and commit them early. This shrinks the problem space dramatically.
Count cells. If a region of the grid has 35 cells, you know you need exactly seven pentominoes (or some equivalent combination) to fill it. This sounds obvious but it's surprisingly easy to forget in the heat of the moment.
Watch for parity tricks. Some levels use a checkerboard parity trick — if you color the grid like a chessboard, certain pieces always cover the same number of black and white cells, and the pre-filled cells might make the remaining counts impossible for certain piece sets. If a level seems unsolvable, check the parity.
Don't memorize, patternize. For timed levels, you can't memorize a step-by-step solution because you'll get disoriented if one placement is slightly off. Instead, learn to recognize the overall pattern — "this looks like an L-in-the-corner configuration" — and react to that.
Take breaks. The hardest Sand Shape level feels impossible when you're frustrated and suddenly clicks after you walk away for an hour. I solved Level 170 about ten minutes after giving up and going to make coffee.
Sand Shape is a game that rewards patience and systematic thinking over raw speed or luck. The hard levels are hard because they're well-designed — every one of them has a solution that feels satisfying once you find it. Stick with it, and don't throw your phone.
Author

Categories
More Posts
Sand Shape All 170 Levels: Complete Walkthrough Guide
A full breakdown of every Sand Shape level from 1 to 170 — what to expect, how difficulty ramps up, and the strategies that carry you through each section of the game.

Sand Shape Beginner's Guide: How to Play and Win Your First 10 Levels
Everything you need to know to get started in Sand Shape — basic mechanics, walkthrough tips for levels 1 through 10, common mistakes, and how to think like a pro.

7 Common Sand Shape Mistakes (And How to Fix Them)
Keep blowing runs in Sand Shape? Here are the seven mistakes that tank your score and the fixes that actually work.
Newsletter
Join the community
Subscribe to our newsletter for the latest news and updates